School break offers a fantastic opportunity to spark curiosity and create lasting memories with your kids. Science at home is all about exploring, experimenting, and having fun with experiments that are both educational and exciting. It isn’t just about mixing ingredients together. It’s about opening a window into how the world works, using common household items to explore ideas and phenomena in a hands‐on way.
Fun and Educational At-Home Science Experiments
At-home science experiments make learning fun, especially during school breaks when routines are more relaxed. These projects encourage kids to ask questions and explore answers through trial and error. They often involve activities that require careful observation, a bit of research, and creative thinking to solve a problem or understand a concept better.
Science projects, such as building homemade volcanoes or creating a simple circuit, give kids a hands-on experience that is both interactive and memorable. Experiments like these help explain complex ideas like chemical reactions and electricity in ways that are easy to understand. They also provide a perfect chance to bond with your children as you work together on exciting projects.
Whether you are a parent looking to inspire a budding scientist or a teacher searching for creative class activities, these experiments offer a mix of fun and education. Even simple experiments help lay the foundation for future learning and grow a lifelong passion for discovery.
Getting Started with Science at Home
Before jumping into your at-home science experiments, it’s important to set up a safe and fun environment. Start by choosing experiments that match your child’s interests and are suitable for their age level. Simple projects typically require very little setup and use materials you likely already have around your house.
Safety is a top priority when working with children, so look for experiments with a low-risk profile. Make sure you have all the necessary safety gear, from goggles to gloves, depending on what the experiment calls for. It’s also a good idea to establish clear rules and instructions before beginning any activities.
Gathering the materials ahead of time and creating a dedicated workspace can make the process smoother. This organization not only helps in maintaining safety standards but also teaches your children valuable skills in planning and responsibility. An open, clutter-free workspace reduces the risk of accidents. It allows everyone to focus on learning and having fun without distractions.
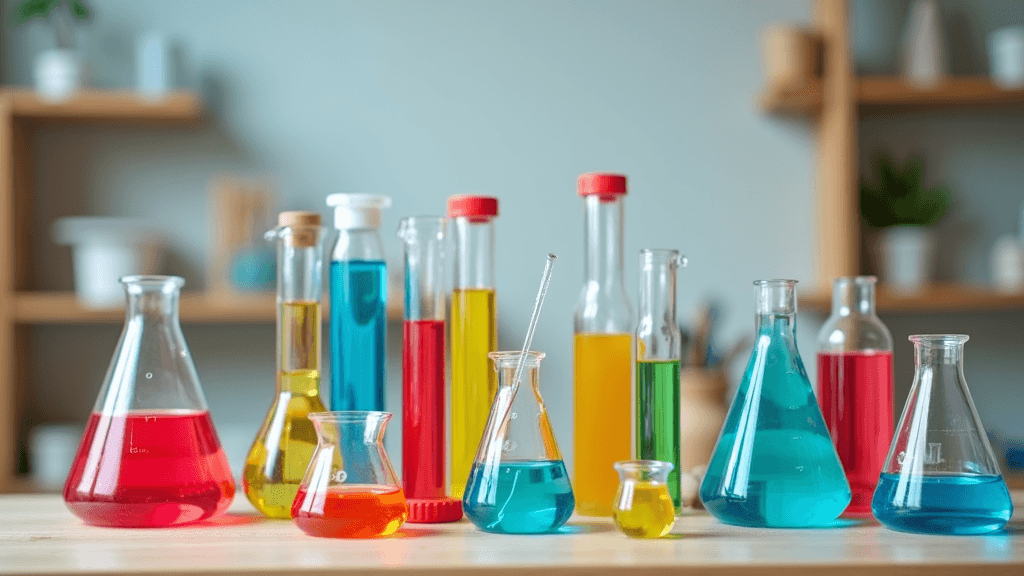
Essential Materials for Your DIY Science Lab
One of the best parts about doing science experiments at home is that you don’t always need expensive equipment. A few simple supplies can open up a world of exploration. Consider setting up a DIY science lab that is stocked with basic materials that can be used across a wide range of projects.
Here is a list of common items that are great starters for a home science lab:
- Vinegar and Baking Soda: Perfect for creating colorful eruptions and exploring chemical reactions.
- Food Coloring: A fun way to add visual excitement to liquid experiments.
- Measuring Cups and Spoons: These help in understanding proportions and tracking changes in experiments.
- Plastic Bottles and Cups: These are convenient for creating mini-labs where you can mix and observe reactions.
- Straws and Balloons: Great for experiments involving air pressure and chemical reactions.
- Paper and Markers: Ideal for recording observations, mapping out results, and sketching ideas.
Items like these often serve as multipurpose tools that can be used for various experiments. As your confidence and curiosity grow, you may find yourself expanding your collection with items like magnets, LED lights, and small motors. Each piece of equipment introduces your family to new scientific concepts and broadens the scope of possible experiments.
Step-by-Step Guide: Building a Volcano Experiment
If you’re looking to try an experiment that is both classic and a hit with kids, building a homemade volcano offers an exciting project with a memorable result. The activity demonstrates chemical reactions vividly and is straightforward enough that younger children can participate with adult supervision.
Follow these steps to create your own volcano at home:
- Build the Volcano Structure: Use clay or playdough to form the volcano around a plastic bottle. The bottle should be centered so it forms the crater of the volcano.
- Add the Base Ingredients: Place the volcano on a tray or a surface that is easy to clean. Pour a small amount of vinegar into the bottle, filling it about one-third of the way.
- Prepare the Reaction Starter: Mix a few drops of food coloring into a small cup of baking soda. The food coloring not only makes the experiment visually appealing but also adds extra fun as you watch the eruption.
- Initiate the Eruption: Quickly and carefully pour the baking soda mixture into the bottle. Stand back and observe as the chemical reaction between the vinegar and baking soda creates an exciting, bubbling eruption.
- Discuss the Science: Once the eruption calms down, take some time to explain the chemical reaction that occurred. Talk about how the combination of an acid like vinegar and a base like baking soda creates carbon dioxide gas. This gas builds pressure that forces the eruption, which is a clear demonstration of a chemical reaction in action.
This experiment not only illustrates key principles in chemistry but also presents a visual spectacle that sparks further interest in scientific inquiry. It opens up conversations about reaction rates, proportions, and the properties of different substances. The volcano experiment is a great way to introduce scientific thinking in a relaxed and engaging setting.
Troubleshooting and Improving Your Experiments
Not all experiments go off without a hitch. Even well-planned experiments may yield unexpected results. This section offers guidance on troubleshooting common issues and refining your methods to achieve more consistent outcomes.
Experiment Setup and Consistency. Sometimes small variations can lead to different outcomes. It’s important to use the same measurements every time you conduct an experiment. This makes it easier to identify what might be causing unexpected results. Writing down each step and noting any changes can be really helpful.
Adjusting Proportions
One common issue is the strength of the reaction. If your volcano does not erupt as dramatically as expected, it might be due to the proportions of vinegar to baking soda. Try adjusting the amounts slightly. Small changes can have a big impact on how vigorous the reaction will be.
Environmental Factors
Sometimes the environment can affect the experiment. Temperature and humidity levels might change the reaction speed or intensity. Performing experiments under similar conditions each time can help you see consistent results, making it easier to pinpoint any variations due to materials or execution.
Learning from Feedback. Use the experiment outcomes as feedback for improving future trials. Encourage your kids to notice what worked and what didn’t. Ask them questions like, “What do you think would happen if we changed this ingredient?” Such questions stimulate critical thinking and scientific curiosity. This reflective process can guide you to make adjustments and achieve more successful experiments over time.
Frequently Asked Questions
Below are some common questions parents and kids often ask when exploring science experiments at home:
Question: What age group is most suited for these experiments?
Answer: Many experiments can be adjusted for a range of ages. Younger children can enjoy the visual appeal and basic reactions with close adult supervision, while older kids might appreciate understanding the scientific explanations behind the experiments.
Question: Are these experiments expensive to set up?
Answer: Most experiments rely on everyday household items or low-cost supplies. Basic ingredients like vinegar, baking soda, and food coloring are both affordable and versatile, making them perfect for repeated use over multiple projects.
Question: How do I ensure safety during these experiments?
Answer: Always set clear rules before starting an experiment. Use appropriate safety gear, work in a well-ventilated space, and ensure children are closely supervised, especially when mixing chemicals. Being prepared and clear about the procedures can greatly reduce any risks.
Question: Can these experiments tie into school subjects?
Answer: Absolutely. They connect directly to topics in science, such as chemistry, physics, and earth science. Teachers and parents have found that hands-on experiments complement textbook learning, sparking interest in subjects and reinforcing classroom concepts.
Additional Benefits of At-Home Science Activities
Expanding your science experiments beyond simple projects can create a multi-faceted learning experience. At-home science activities can help develop problem-solving skills, improve teamwork, and foster creativity. When children participate in the setup process, they learn the value of planning, measuring, and adjusting their methods to get better results.
Moreover, involving the whole family in science activities not only makes the learning experience fun but also builds confidence among children. It allows parents and kids to share moments of discovery, ask questions, and build on ideas together. Spending quality time as a family while exploring scientific concepts contributes to stronger bonds and a supportive learning atmosphere.
Practical Tips for a Successful Science Adventure
Here are a few practical tips to make the most of your science sessions at home:
- Organize a designated area in your home for experiments to keep supplies within reach.
- Keep a science journal for observations, notes, and creative ideas that might emerge during your experiments.
- Encourage every family member to get involved. Even simple tasks like measuring ingredients can teach key math and science principles.
- Be flexible with your planned experiments. Sometimes an unexpected outcome can open up the opportunity for a new experiment.
- Plan follow-up activities to discuss the results and explore related topics through books or documentaries.
By incorporating these tips, you ensure that each experiment is not only fun but also a well-rounded learning opportunity. Over time, these experiences build a strong foundation for academic growth and nurture a mindset geared toward creativity and innovation.
Final Thoughts on Exploring Science at Home
Science experiments at home are more than just fun activities. They are opportunities for learning and growth. By setting up simple experiments, you enable your kids to investigate the natural world and understand complex concepts in a very tangible way. This type of learning is impactful as it goes beyond memorization. It gets children involved in critical thinking and problem solving.
As you experiment, keep in mind that every outcome, whether expected or surprising, is a learning opportunity. Celebrate the successes. Learn from any mishaps along the way. Building a routine around science exploration during school break not only creates fun memories but also lays the groundwork for a lifelong love of learning.
Jumpstarting this adventure of scientific discovery at home can be one of the most rewarding ways to spend quality time with your children. The experiments you try will spark curiosity, promote involvement, and lead to inspiring conversations about the world around you. Enjoy the process, encourage your kids to ask questions, share ideas, and most importantly, have fun while exploring the wonders of science.
Taking time for at-home science experiments opens many doors. It is not just a task to complete. It is a way to connect, learn, and grow together as a family. Every project turns everyday moments into opportunities to learn something new. Over time, these experiences help develop a mindset geared for creativity and innovation, nurturing young minds to think critically and solve real-world problems. Remember, each experiment is a stepping stone to a future filled with discovery and joy.
If you’re looking to save some extra cash I always recommend planning ahead and watching for big sales at times of the year like Black Friday, Cyber Monday and Boxing Day. Major discounts can also be found after the related season comes to a close and I always recommend keeping an eye out for Amazon Prime Day Deals as those can offer big savings too!
As an Amazon Associate I earn from qualifying purchases.